


Your guide to roof flashing

By IKO.
Get an overview on roof flashing, from what it is, why it is important and how to install it!
Roof flashing is critical to a building's’ structural integrity due to its role in waterproofing the roof. Without flashing, areas such as joints and transitions in the roof are vulnerable to water seeping through and damaging the building. But what exactly is roof flashing?
It is a series of thin metal strips, usually galvanized steel, which are placed to redirect water that might have seeped in at vertical joins (like at a dormer) or around roof features (such as vents) back onto the shingles and, eventually, off the building.
Having damaged or improperly installed flashing is one of the most common causes of roof leaks. It is crucial on all parts of the roof, but especially in areas such as the chimney, roof cricket and dormers. The worst-case scenario with damaged roof flashing is wood rot and structural collapse. Learn in this guide from IKO about how to understand the flashing on your house and whether it needs repairs.
Types of roof flashing
There are almost as many types of roof flashing as there are parts of the roof! After all, each roof feature needs protection. These are the key types of roof flashing you need to understand:
- Continuous flashing: Continuous flashing is also called “apron flashing” because it acts a lot like an apron. It’s a long, single piece of metal that carries water down to the shingles below. Long pieces of continuous flashing will have trouble flexing as the home expands and contracts in the changing seasons. If left as is, it could break or warp and fail to keep water out. Therefore, long pieces have built-in expansion joints so they can move with the home.
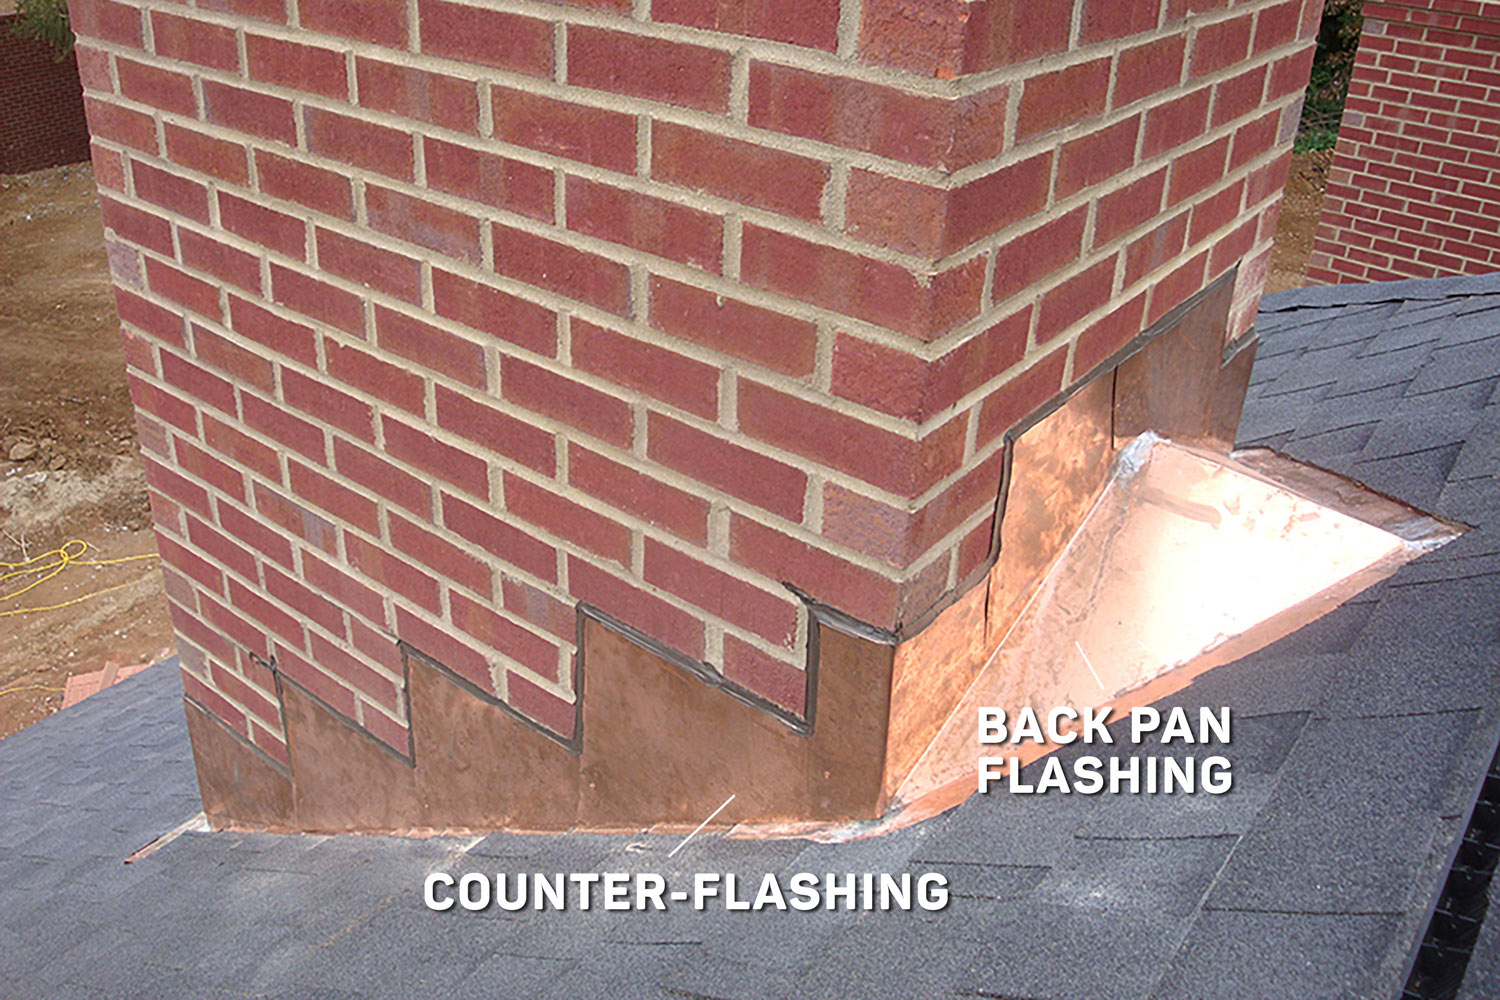
- Base flashing: Some roof features, such as chimneys, require two pieces of flashing. This ensures that rain always meets a flashing surface that directs it downwards. Plus, it is notoriously tough to install flashing around a chimney. There is another benefit to two-part flashing: When the roof materials naturally expand and contract with weather changes, the two pieces can move, so the whole system stays secure. The base flashing (or apron flashing) is the bottom piece.
- Counter-flashing: Placed opposite to base flashing, or above base flashing, counter-flashing completes the two-part team.
[Insert “dripedge.jpg” to the right of the bullet points]
- Step flashing: Step flashing is a rectangular piece of flashing bent 90 degrees in the center. It is used for roof to wall flashing. Multiple pieces of the flashing will be installed in layers with shingles to ensure the water flows away from the wall. Learn how to install it below.
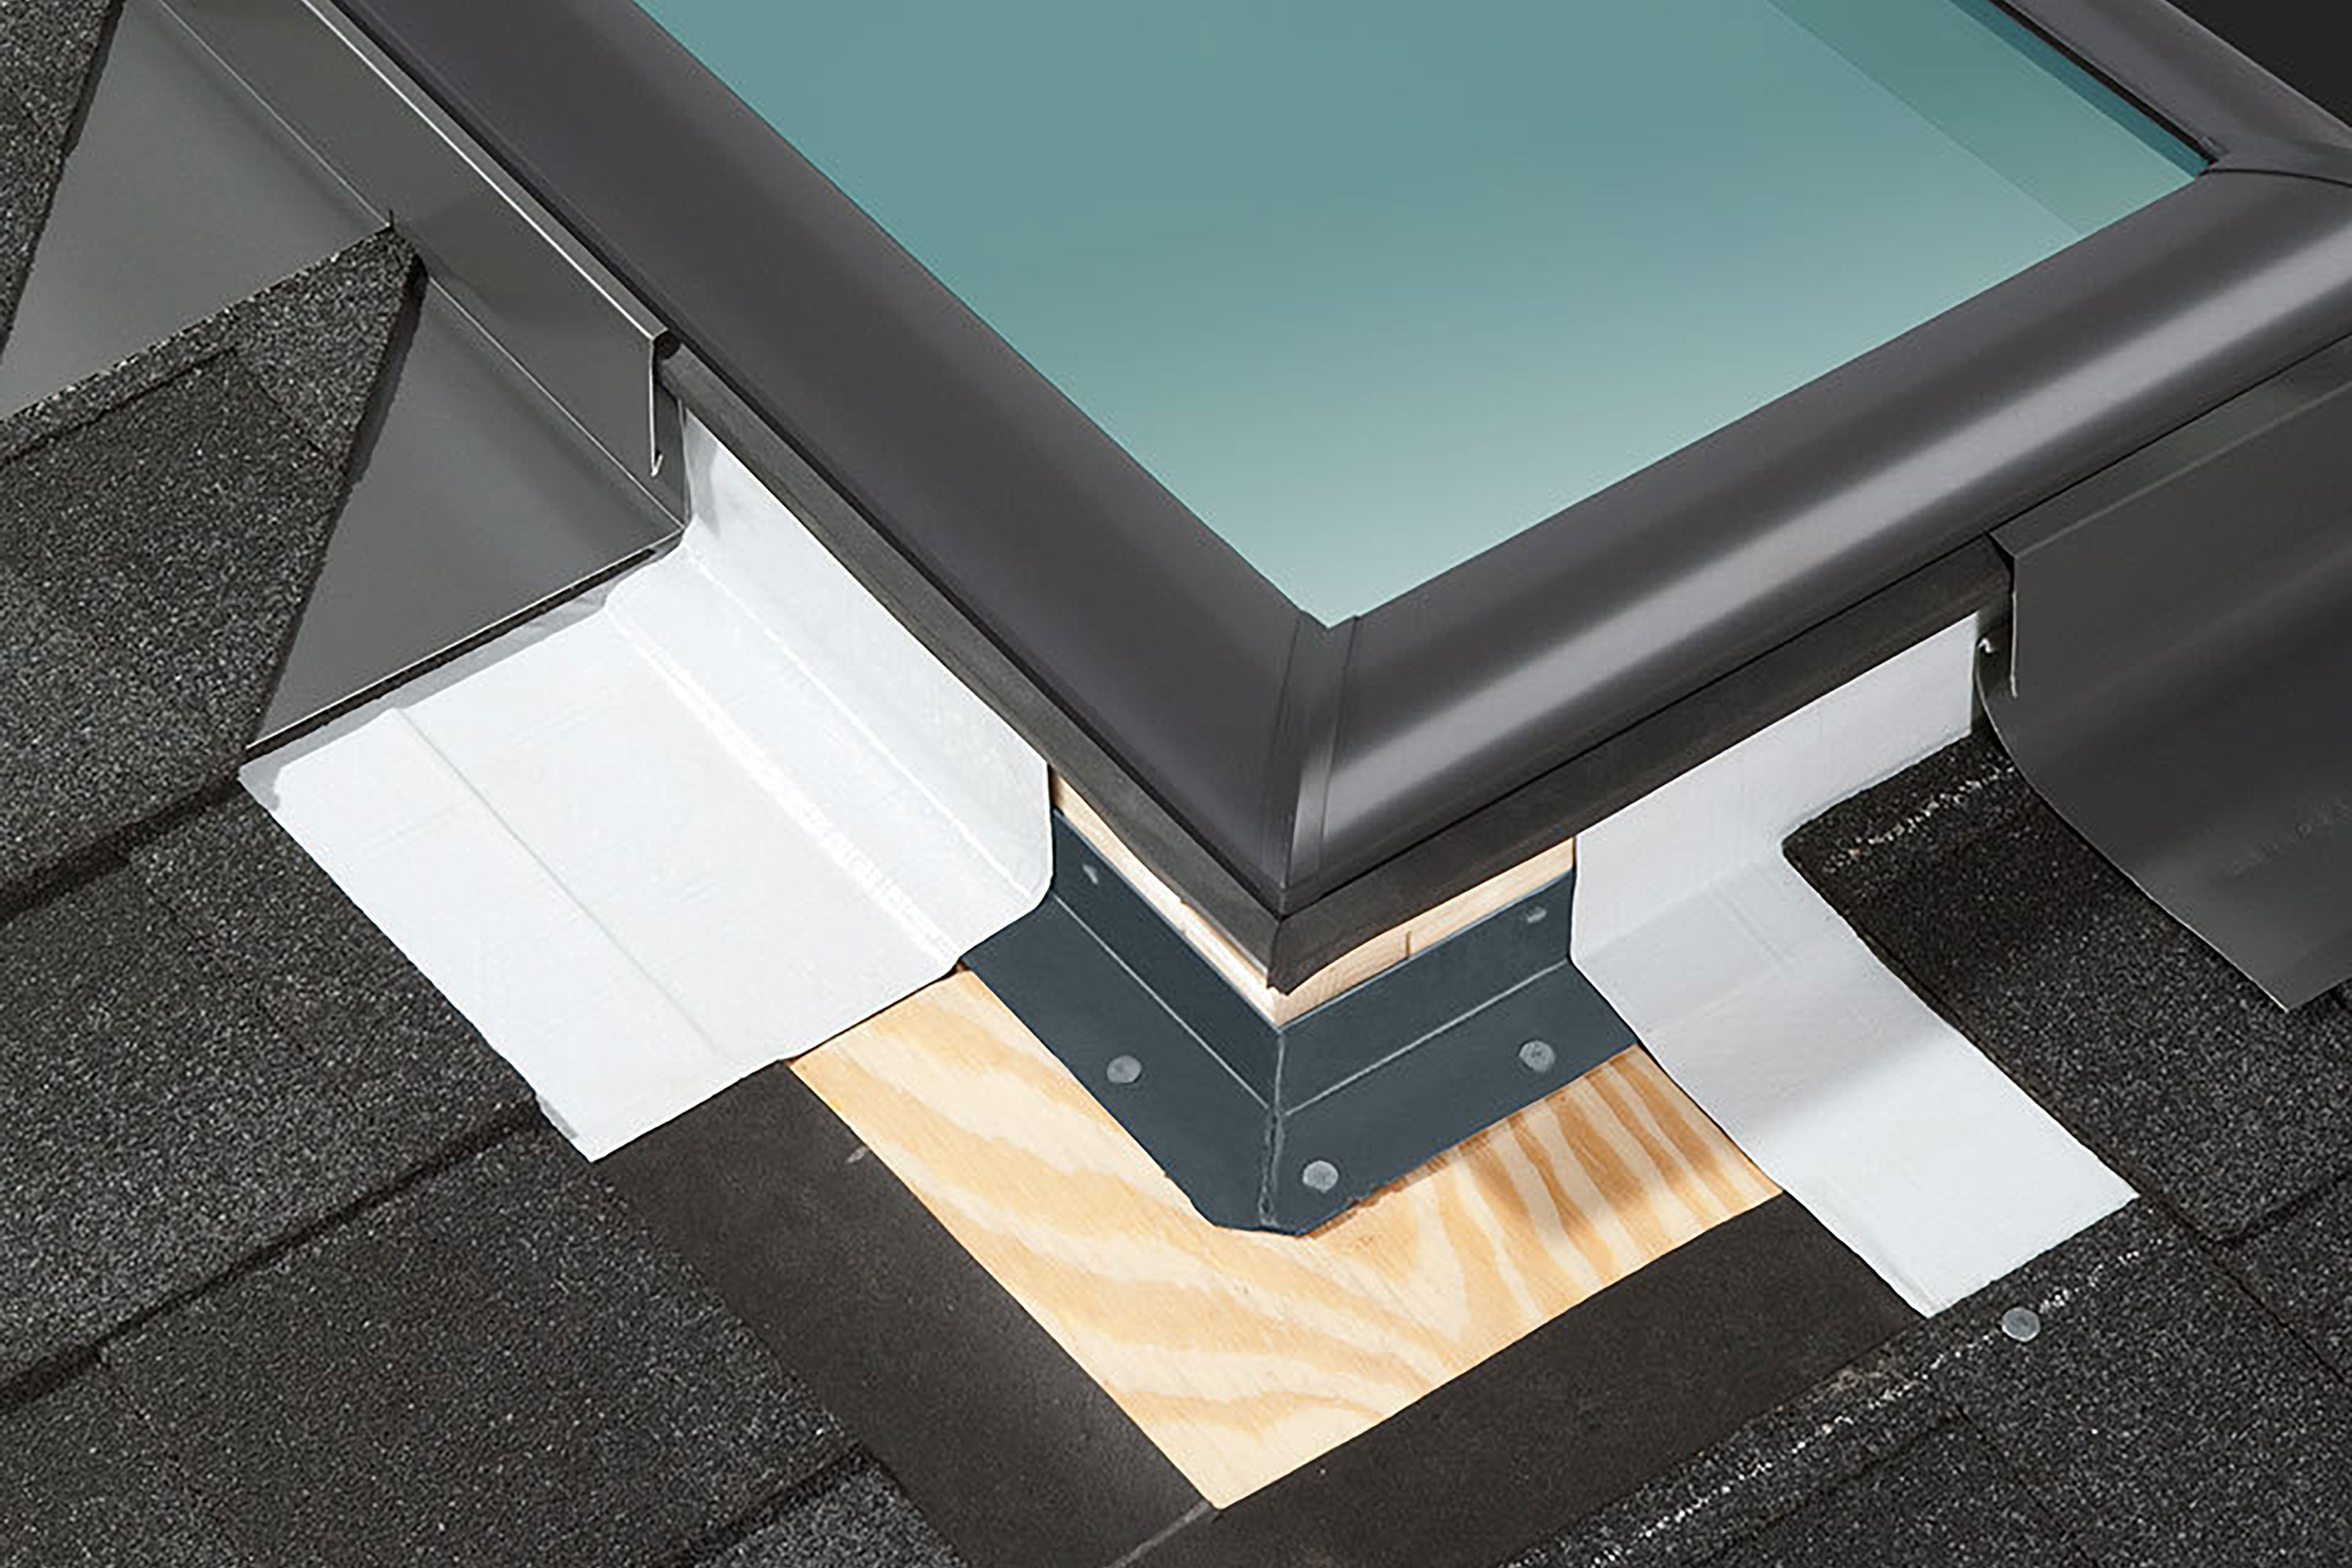
- Skylight flashing: While some skylight manufacturers include flashing in their products, sometimes roofing professionals have to create it or purchase it separately.
- Valley flashing: Open valleys have metal flashing to protect this critical area of the roof.
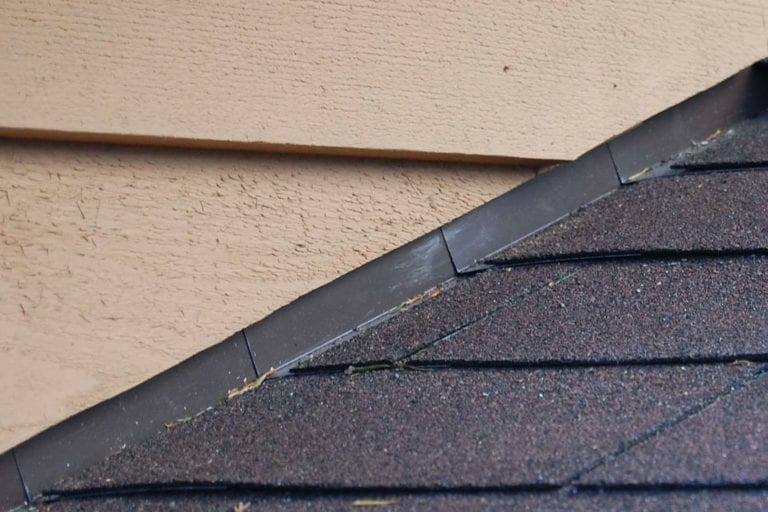
- Drip edges: The edge of the roof has thin metal flashing that helps water drip off the roof without damaging the home or causing a leak.
- Kickout flashing: Roofing professionals need something to bridge the gap between where step flashing ends and the gutter begins. Kickout flashing directs water away from the wall and into the gutter. Learn how to install kickout flashing below.
While there are premade flashing pieces you can purchase, many roofing professionals will cut their own roof flashing from sheet metal. They’ll use tinning snips to cut the sheets and bend them to the exact size they need while on the roof. However, if you walk into a store to buy your own flashing, be careful. There are other types of premade flashing that are not made to be used on roofs and may break if you try to install them on a roof. For example, head flashing or cap flashing protects doors and windows from water.
Roof flashing sizes
If you intend to install or repair roof flashing, then you’ll need to pay attention to size. The flashing for your plumbing vent needs to be large enough to surround the vent, so it should be just wider than the vent’s diameter.
Further, your step flashing pieces need to be 10 inches (254 mm) long and at least 2 inches (50 mm) wider than the exposure of the shingle you’re using. For example, 3-tab shingles usually have a 5 5/8-inch (143 mm) exposure. Typically, 10- by 8-inch (253 mm x 203 mm) flashing is chosen. Those 8 inches are more than enough to cover the exposure of typical shingles. The same size can be used to cover the longer exposure on CambridgeTM shingles.
However, if you were using IKO’s Crowne SlateTM, with a 10-inch (254 mm) exposure, you’d need a 10- by 12-inch (254 mm x 304 mm) step flashing piece.
Roof flashing materials
In the past, roofing professionals would use lead, or lead-coated materials, as flashing. However, roofing professionals in North America now prefer other materials:
- Aluminum: Aluminum flashing is easy for roofing professionals to form and is lightweight. However, aluminum must be coated if it is to be used with concrete and masonry, as plain aluminum reacts and degrades when it touches alkaline surfaces. In coastal areas, aluminum flashing should be coated even if it does not contact concrete or masonry, to prevent corrosion.
- Copper: Copper roof flashing is also malleable and takes soldering well. It’s also highly durable and has a long life. On the other hand, it does discolor into a patina, which some homeowners dislike, but others favor. You will still routinely find copper flashing around chimneys.
- Steel: Steel is usually the material of choice for flashing. It’s malleable, has aesthetic value and, when galvanized, is corrosion-resistant.
Building codes may demand your roofing professional use a specific material for flashing. They may also list a minimum thickness. Most building codes require 26-gauge galvanized steel as a minimum. You should always check your local codes to be sure you’re following them. In fact, if you live in Florida, you may find that your building codes call for a special flashing material, modified bitumen roofing tape:
- Modified bitumen roofing tape: Modified bitumen is a watertight, tough material. When made into a tape, it can be used to aid roof flashing. The specific tape you use will have to be approved by your building code and of a certain width.
Roof flashing sealant types
When you install roof flashing, you will need to use a sealant. While roofing professionals occasionally use nails when flashing, they must choose whether to nail to the roof plane or the vertical wall. If nailed to both, the flashing may deform under the pressure from shifting brick or wood. When nailed only to the roof plane or vertical wall, the flashing can stay in place while the other building materials expand and contract throughout the seasons.
One option during the installation is roofing cement, which creates a waterproof seal. Roofing professionals usually apply it with a trowel.
Roof flashing techniques
Before you learn how to install roof flashing, you need to understand that there are three primary techniques, each suitable for different areas on the roof. You’ll find that some types of flashing correspond to a specific technique.
- Step flashing: Step flashing is best for where the roof face meets a wall, for example, where a dormer projects out of the roof. In this spot, it’s possible that water could flow down the wall and slip past the shingles into the building below. Step flashing ensures that water is directed away from the wall and ends up in the gutter. It’s installed in steps, with layers of shingles between, so that the water pours down each step and down the roof.
- Counter-flashing: Counter-flashing is often used to flash chimneys. It involves two pieces of flashing. The first, base flashing, sits around the bottom of the chimney. The second piece, the counter-flashing, is embedded into the masonry of the chimney. It sits over the base flashing to ensure water doesn’t slip behind the base flashing. Construction professionals use counter-flashing for many other purposes, but it always involves a second piece of flashing set off from the first.
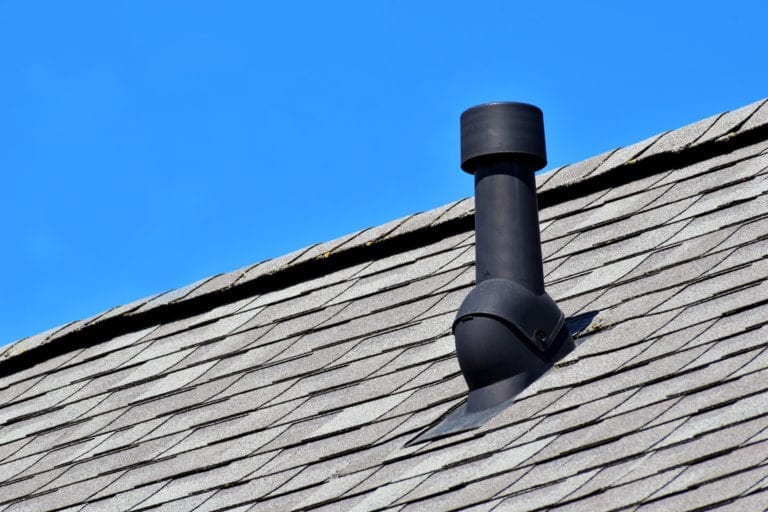
- Plumbing vent boot flashing: Vent flashing is a cylindrical piece of flashing that fits right around the vent. The shingles are installed over the base or boot. The height of the boot forces water to run around the vent.
How to install roof flashing
Disclaimer: Roof flashing should always be installed by professional roofers, who understand best practices, safety requirements and the building codes and laws in their area. These instructions are only to help homeowners understand what to expect from their roofing professional.
Step flashing is the most time-consuming of all flashing jobs on the roof because you must complete it step-by-step as you shingle up the roof. There are a few general best practices you need to know. First, step flashing must be installed before the siding, so that the siding can cover the top of the flashing. If this is a repair job, the siding must also be removed and replaced with the flashing. Second, step flashing needs to extend 8 to 14 inches above the shingles, according to the National Roofing Contractors Association (NRCA).
Also, before you start installing your flashing, you need to look to see if the wall in question has a corner on the roof face. If it does, follow our first installation procedure. If it doesn’t have a corner, and simply looks like the image below, follow the second installation procedure.
How to install step flashing with a wall corner
If a wall corner is on the rooftop, you will need to create a corner flashing piece using a typical step flashing piece. These instructions will tell you how to create a corner piece and how to install step flashing generally.
- Install your underlayment completely and your shingles up to where the wall begins, so that the first piece of flashing, or the corner flashing, will rest on a shingle.
- To make corner flashing, take your tin snips and cut a 45-degree line from an outside corner to the center fold. Then, cut along the center fold and remove the resulting triangle. This will allow you to bend the step flashing around the corner cleanly. If you do not wish to form your own corner flashing, you can buy pre-bent pieces and cut them to size, or use a piece of corrugated aluminum, which is easier to bend.
- Bend the corner flashing tightly around the corner. Ensure it sits flat and extends at least 8 inches above the shingles. Nail it in place with two nails, one on each side of the top edge.
- Take a second piece of flashing and set it down in place. Bend it back so that it overlaps the corner flashing.
- Remove this second piece and apply your sealant where the flashing will overlap. Then, set the piece down. Hammer one nail to the bottom of the flashing, high up so that the next row of shingles will cover it.
- Finish a whole shingle course above this piece of flashing.
- Now you must apply a piece of step flashing where the next course of shingles will start. This piece must overlap the last piece of flashing by at least 3 inches. Apply sealant where the base of the flashing will sit, place the flashing.
- Continue to alternate between shingles and flashing until you reach the top of the roof.
- To flash the peak of the roof, you will need to create another custom piece of flashing. Take a usual piece of step flashing and cut into its fold, about halfway.
- Leaving one side of the cut piece straight, bend the other side to match the peak of the roof, as shown below. Use roofing cement to secure this piece and a single nail in the base. Later, you will cover it with a ridge shingle.
How to install step flashing where there is no wall corner
If your roof face connects to the wall cleanly without creating a corner, then you don’t need to create a corner flashing piece. Instead, you will need to install kickout flashing to help guide the water into the gutter. While some professional roofers will make their kickout flashing by hand in copper, if you’re using galvanized steel, it will be too tough to bend properly. Instead, buy a premade kickout flashing piece. Here’s how to install kickout and step flashing.
Place your kickout flashing on the base of the roof, snugly against the wall. Briefly remove the piece and apply roofing cement where it will sit.
- Place the first piece of step flashing over the end of the starter strip, ensuring it leads directly into the kickout flashing. Use roofing cement and two nails to secure it to the roof deck. Place the nails on the base of the step flashing piece, so you’re nailing into the deck. Also place the nails high, so the next course of shingles will cover them.
- Once the kick flashing and first piece of step flashing are secure, you have to apply a shingle. First, apply sealant to the base of the flashing. Lay a shingle on top of the flashing and nail it as usual. Notice that the bottom of the shingle covers the flashing base and nail.
- Finish the whole shingle course.
- To complete the step flashing, follow the same procedure as described above for installed step flashing with a corner piece, starting at step seven.
- Seal the indent with roofing caulking, so the counter-flashing hangs securely.
How to install a roof plumbing vent flashing boot
Installing a roof plumbing vent is typically an easier task than flashing a chimney. Here is how you do it:
- Install shingles as normal up to the base of the plumbing vent.
- Place the flashing or boot onto the plumbing vent, so the base is resting on shingles. Momentarily lift the boot and apply sealant to hold the flashing in place.
- Firmly push the flashing back down into place.
- Install the next course of shingles. When you reach the plumbing vent, allow the shingles to overlap the top of the flashing.
- To make room for the vent itself, cut out a circular piece of the shingles, as shown below.
- To secure the circular edge of the shingle, apply roofing cement beneath it. Ensure you also nail it where you normally would.
Do you need information about how to install the other kinds of roof flashing? IKO has already explained how to install drip edge flashing and how to install metal valley flashing.
Can you re-use old roof flashing?
On a typical re-roofing job, where you are replacing an old or underperforming roof, it is wise to replace all flashing. Old flashing may begin to fail before the new roof’s lifespan is over. However, there are limited circumstances where a roofer may decide to reuse flashing. For example, if a roofer is doing a repair job on a relatively new roof and the flashing appears to be in good condition, it may be salvaged.
To decide whether or not your flashing can be reused, your roofer will need to remove the flashing carefully to prevent damaging it. Your roofer will then inspect it before deciding to reuse it. If your roofer is replacing the shingles around your flashing, the flashing must be removed, at least temporarily, to allow for proper installation.
Some types of flashing, like step flashing, may be more challenging to reuse because it is harder to separate from the old shingles without denting or otherwise damaging it. Typically, a roofer will replace step flashing on a new roof.
Also, your roofer should not layer new flashing on top of the old flashing. You should only have one layer of flashing on a roof at a time.
When to repair a roof flashing leak
You might also wonder when you should replace roof flashing. Check over your flashing and look for:
- Damage, holes or bending.
- Corrosion or rusting.
- Loose or missing nails.
- Dried out or missing sealant.
- Flashing that has come loose.
If you find any of these problems, you may need to replace the flashing. You may also wonder if you’ll need to replace your flashing when you’re having a new roof installed. That depends on a few factors. If the original flashing is in good condition and can be removed without damaging it, it is possible to reuse it. However, you’ll need to prioritize proper fit and seal over saving money if you want a watertight roof; so be prepared to purchase new flashing where needed.
How to repair roof flashing
Disclaimer: Fixing roof flashing, just like installing flashing, is best left to roofing professionals. You should not take risks with your roof.
- Gently pry up the shingles surrounding or covering the damaged flashing. When working with step flashing, this may involve removing undamaged pieces of flashing as well.
- Take your chisel and gently remove any asphalt cement you find.
- If you caught the flashing problem before a leak began, there should be no damage to the underlying roof parts and structure. However, it’s important to check for damage anyway. If you find damage, then you will have to get it repaired before reinstalling the flashing.
- Now, reinstall the new flashing and shingles. Be sure to follow the proper order, as described above, especially when installing step flashing, to ensure the flashing will stand up to water.
Though roof flashing isn’t the most dramatic element of a roof, it is one of the most important. If you find some flashing on your roof that you’re concerned about, we suggest you find a professional roofer who can help you solve all of your roof flashing problems or answer the questions you have about your specific roof.
Original article source: IKO
Disclaimer: The information provided on AskARoofer.com or information sent by emails is the opinion of the writers. It is the responsibility of the reader to check for accuracy in one's own jurisdiction, as there are different codes and restrictions for different parts of the country. AskARoofer.com does not accept any liability for the use of information on this website or email. AskARoofer.com has no controls over product failures, installation, or climate conditions that may change the roofing process in your area. Our information is in general to our area and cannot be the same as your local town or state. It is advised to seek the local Building Department, Licensed Contractor, and local Product Representative for proper installation requirements and code enforcement when installing a new roof.
Have a question? AskARoofer.
Find your local roofing contractor in the AskARoofer™ Contractor Directory.
Recommended For You

Your Silicone Questions Answered
Read More ...
Fast facts about this global shingle manufacturer
Read More ...
Creating homes that balance form and function
Read More ...


 - Ad - Ice & Water")
")
Comments
Leave a Reply
Have an account? Login to leave a comment!
Sign In